The Engineer’s Blueprint Part I: GitHub Project Vending Machine
Automating GitHub repository creation and Azure OIDC integration using a Terraform-based 'GitHub Project Vending Machine'.
The Engineer’s Blueprint Part I: Building a Project Vending Machine
📖 The Problem: The “Snowflake” Portfolio
As an IT professional, I love setting up lab environments, testing new features, and experimenting with new tools. Until now, however, I have primarily done this locally on my desktop PC. Whenever I did decide to set up a remote repository, it usually resembled a “snowflake”: unique, delicate, and impossible to replicate exactly.
I have decided to change that and treat my GitHub profile like more like a production environment from now on. This post describes the first step: using Terraform to build a GitHub Project Vending Machine. The goal is to create consistent GitHub repositories for new projects and build clean, automated Workload Identity Federation (OIDC) integrations into my Azure environment from the very start.
🛠️ The Architecture: Project Vending Machine
My setup uses a central “Meta-Repo” to govern my entire portfolio.
When I want to start a new project, my Terraform engine performs five key actions:
- Creates the GitHub Repository with a security-hardened baseline.
- Vends a dedicated Azure Service Principal (SPN) specifically for that project.
- Establishes a Federated Identity (OIDC) trust between the new repo and Azure.
- Assigns permissions to the SPN using an Azure role assignment.
- Injects the Credentials into the new repo’s secrets—automatically.
🏗️ The Foundation: Prerequisites
To successfully set up the project vending machine, we need:
- A GitHub Repository, a Terraform Backend, and Azure OIDC Integration.
- A GitHub Personal Access Token (PAT).
- Entra ID and Azure RBAC privileges.
Step 1: GitHub, Backend, and OIDC
We start by manually creating one final repository: the Project Vending Machine. This will be the last repository you ever create via the UI. To set up the initial Terraform backend and Azure OIDC integration for this meta-repo, you can follow my previous blog post.
Step 2: GitHub Permissions
To vend new projects, our Terraform deployments must be authorized to act on our GitHub profile. The ideal approach would be to use GitHub Apps, which provide fine-grained permissions and avoid long-lived credentials. However, GitHub Apps are only supported for repository creation on organization accounts, not personal ones.
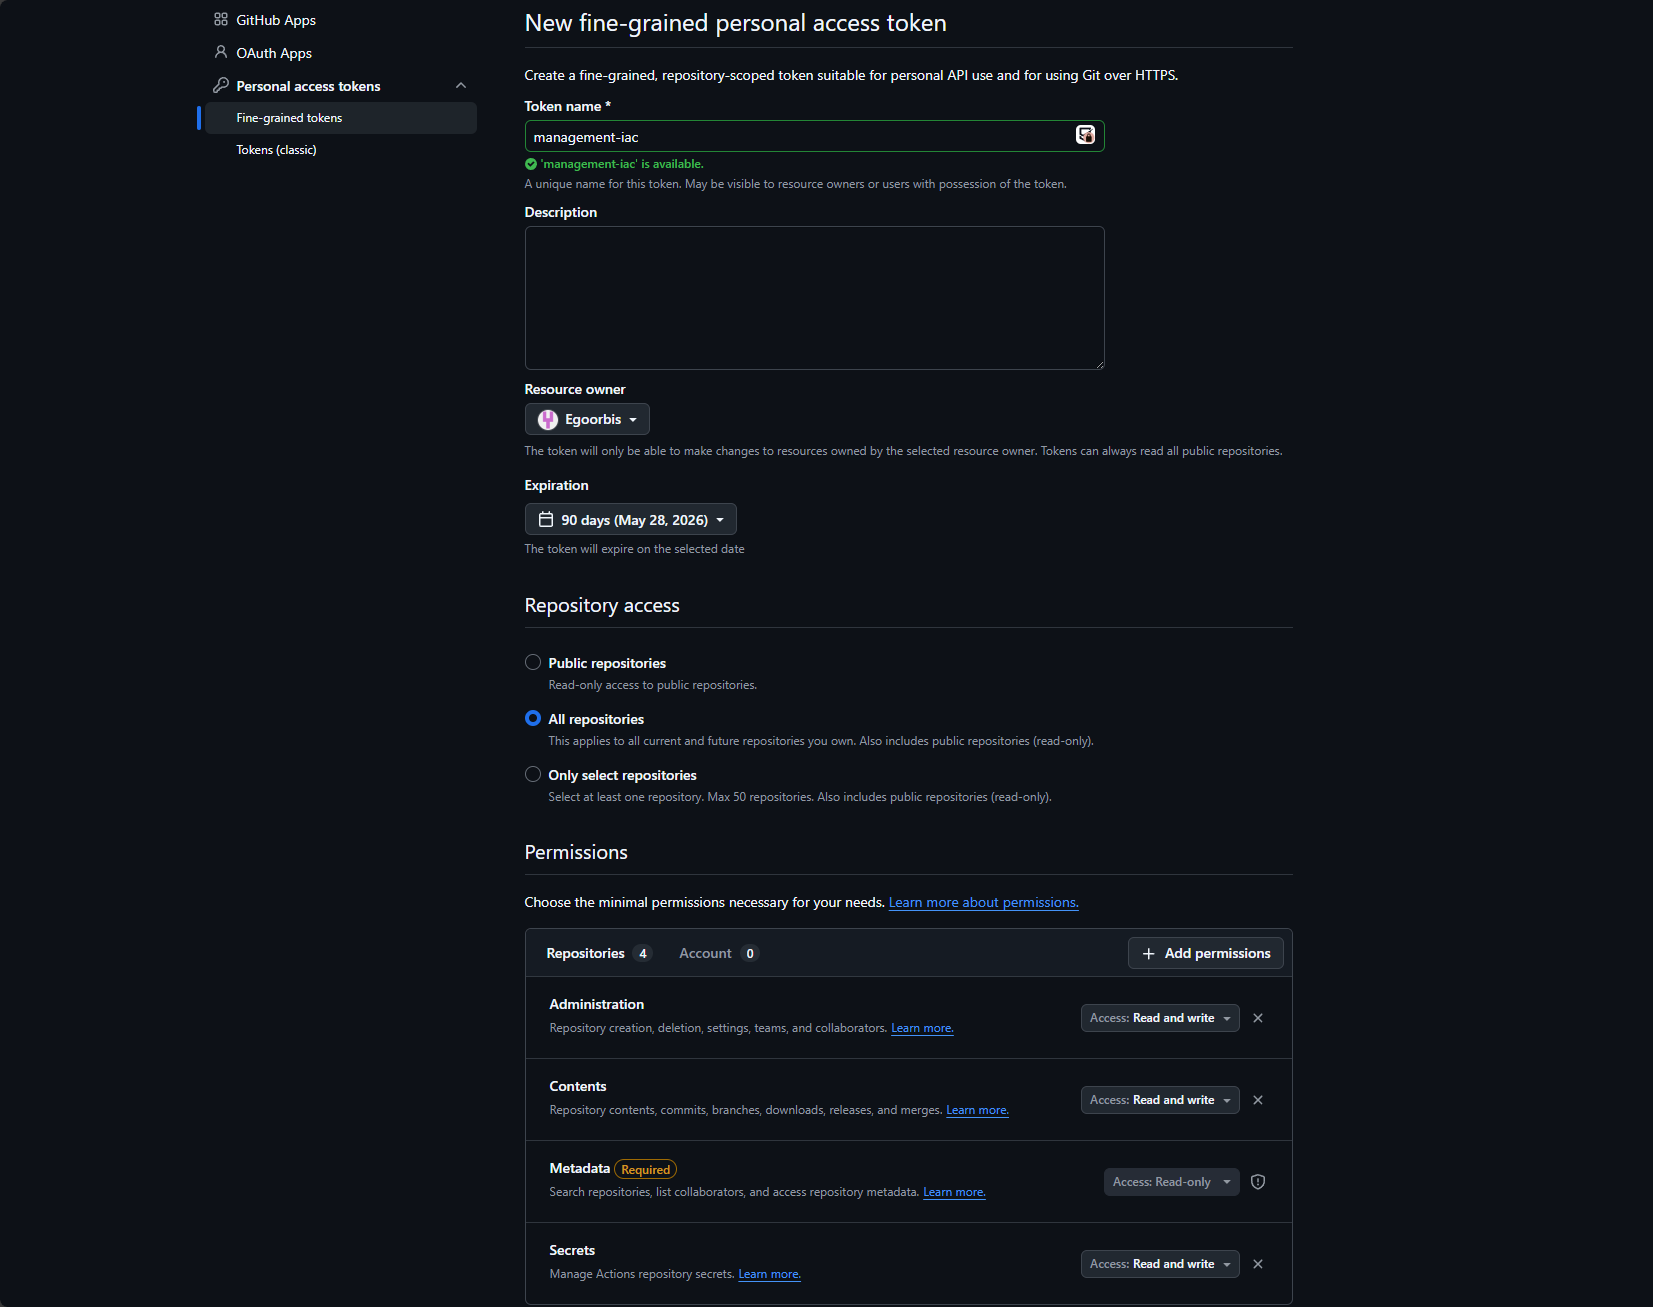
The fallback is a Fine-grained Personal Access Token (PAT).
- On GitHub navigate to Settings > Developer Settings > Personal Access Tokens > Fine-grained tokens.
- Grant the following permissions to all repositories:
- Administration: Read and write
- Contents: Read and write
- Secrets: Read and write
- (Metadata permissions are added automatically)
Create the token and add it as a secret to your project vending repository. After step 1 and 2 you should now have the following secrets in your project vending repository:

Step 3: Entra ID and Azure RBAC Permissions
To allow the Service Principal created under step 1 to vend identities in Entra ID and assign roles in Azure, it needs additional privileges:
| Scope | Role Required | Why? |
|---|---|---|
| Entra ID | Application Administrator | To create App Registrations (Service Principals) and configure Federated Credentials |
| Azure RBAC (e. g. Management Group or Subscription) | User Access Administrator | To create Azure role assignment to the vended projects. |
Tip: While
Application Developeris often enough to create an SPN, you will needApplication Administratorto “Patch” existing objects and handle full lifecycle management during Terraform updates.
After assigning these permissions, we are ready to setup the necessary code for the Project Vending Machine.
📂 Repository Structure: The Framework Layout
I have structured the Project Vending Machine repository to separate core logic from implementation:
1
2
3
4
5
6
7
8
9
10
11
12
13
14
15
16
17
18
gh-project-vending-machine/
├── .github/workflows/
│   └── vend-project.yml       # The CI/CD Pipeline
├── modules/
│   ├── entra-spn/             # Module: Vends SPNs, OIDC Trust and Azure permissions
│   │   ├── main.tf
│   │   ├── variables.tf
│   │   └── outputs.tf
│   └── repository/            # Module: Standardizes GitHub Repos & Secrets
│       ├── main.tf
│       ├── variables.tf
│       └── outputs.tf
├── projects/
│   ├── main.tf                # The "Orchestrator" (Calls modules)
│   ├── providers.tf
│   └── variables.tf
├── .gitignore
└── README.md
🔍 Structure Breakdown
modules/entra-spn: I use this module to create Azure Service Principals (SPNs). It is decoupled from GitHub, allowing us to technically vend identities for other platforms in the future.modules/repository: This is the core module for creating projects in GitHub. It does not just create a repository; it “decorates” it with secrets provided by the entra-spn module and enforces a security baseline, including Secret Scanning and Branch Protection.projects/: This acts as the Orchestration Layer, where we vend our projects. By keeping this separate from the modules, we can in future also manage different “stacks” (e.g., a production folder for blog projects and a lab folder for temporary experiments) while using the same underlying logic.
By modularizing the entra-spn and repository logic, adding a new project to my portfolio requires zero “copy-pasting” of code. I simply declare a new module block in projects/main.tf, and the entire project skeleton — from Entra ID to GitHub Secrets — is provisioned automatically.
This modular approach ensures consistent settings across environments and guarantees that every project receives its own .tfstate file in Azure, reducing the blast radius of any potential state corruption.
🔗 Explore the Code
You can view the full “Project Vending Machine” repository here: 👉 gh-project-vending-machine
👨💻 Usage: Deploying a Repository
To deploy a new repository, we simply add a new module call to our projects/main.tf. We first call the modules/entra-spn and then the modules/repository, passing the client_id from the SPN module into the repository module.
1
2
3
4
5
6
7
8
9
10
11
12
13
14
15
16
17
18
19
20
21
22
# 1. Vend the Identity
module "test_spn" {
  source          = "../modules/entra-spn"
  repo_name     = "my-first-automated-repo"
  azure_subscription_id = var.azure_subscription_id
}

# 2. Vend the Repository
module "test_repo" {
  source      = "../modules/repository"
  repo_name   = module.test_spn.repo_name
  description = "This repo was created entirely via Terraform and GitHub Apps."

  additional_topics = ["terraform", "testing"]

  azure_client_id       = module.test_spn.azure_client_id
  azure_subscription_id = var.azure_subscription_id
  azure_tenant_id       = var.azure_tenant_id
  backend_resource_group = var.backend_resource_group
  backend_storage_account = var.backend_storage_account
  backend_container = var.backend_container
}
Once we commit these changes to the main branch, our GitHub Actions workflow (vend-project.yml) takes over. This workflow is the “heart” of the project vending machine.
name: "Vend new Project"

on:
  push:
    branches: ["main"]
  pull_request:
    branches: ["main"]
  workflow_dispatch:

permissions:
  id-token: write
  contents: read
  pull-requests: write

jobs:
  terraform:
    name: "Terraform Action"
    runs-on: ubuntu-latest
    defaults:
      run:
        shell: bash
        working-directory: ./projects
    env:
      ARM_USE_OIDC: true
      ARM_CLIENT_ID: $
      ARM_SUBSCRIPTION_ID: $
      ARM_TENANT_ID: $
      BACKEND_RESOURCE_GROUP: $
      BACKEND_STORAGE_ACCOUNT: $
      BACKEND_CONTAINER: $
      BACKEND_KEY: $

      # Terraform variables
      TF_LOG: WARN
      TF_VAR_github_token: $
      TF_VAR_azure_subscription_id: $
      TF_VAR_azure_tenant_id: $
      TF_VAR_backend_resource_group: $
      TF_VAR_backend_storage_account: $
      TF_VAR_backend_container: $

    steps:
      - name: Checkout Code
        uses: actions/checkout@v4

      - name: Setup Terraform
        uses: hashicorp/setup-terraform@v3

      - name: "Terraform Version"
        id: version
        run: terraform --version

      - name: Terraform Init
        id: init
        run: |
          terraform init \
          -backend-config="resource_group_name=$BACKEND_RESOURCE_GROUP" \
          -backend-config="storage_account_name=$BACKEND_STORAGE_ACCOUNT" \
          -backend-config="container_name=$BACKEND_CONTAINER" \
          -backend-config="key=$BACKEND_KEY" \

      - name: Terraform Plan
        id: plan
        run: terraform plan -out=terraform.tfplan -input=false -lock-timeout=300s

      - name: "Upload Terraform Plan to Working Directory"
        uses: actions/upload-artifact@v4
        with:
          name: terraformPlan
          path: "terraform.tfplan"

      - name: Terraform Apply
        id: apply
        if: github.ref == 'refs/heads/main' && github.event_name == 'push'
        run: terraform apply terraform.tfplan
Key Features of the Workflow:
- Zero-Trust Authentication: The workflow uses
permissions: id-token: writeto request a short-lived JWT token from Azure via OIDC. Long-lived credentials are never stored in GitHub Secrets. - Secure Variable Injection: GitHub Secrets are mapped directly to Terraform variables using the
TF_VAR_prefix (e.g.,TF_VAR_github_token: $). This ensures credentials or other sensitive values are injected at runtime without being hardcoded in the code. - Plan & Review Workflow: On Pull Requests, the workflow executes
terraform planand uploads the artifact. This allows human review of all infrastructure changes before they are applied. - Automated Deployment: Once code is merged to main, the workflow executes
terraform apply, provisioning infrastructure in seconds.
This workflow transforms manual UI-based provisioning into a fully automated, auditable Infrastructure-as-Code pipeline.
As a result we have a new project repository.
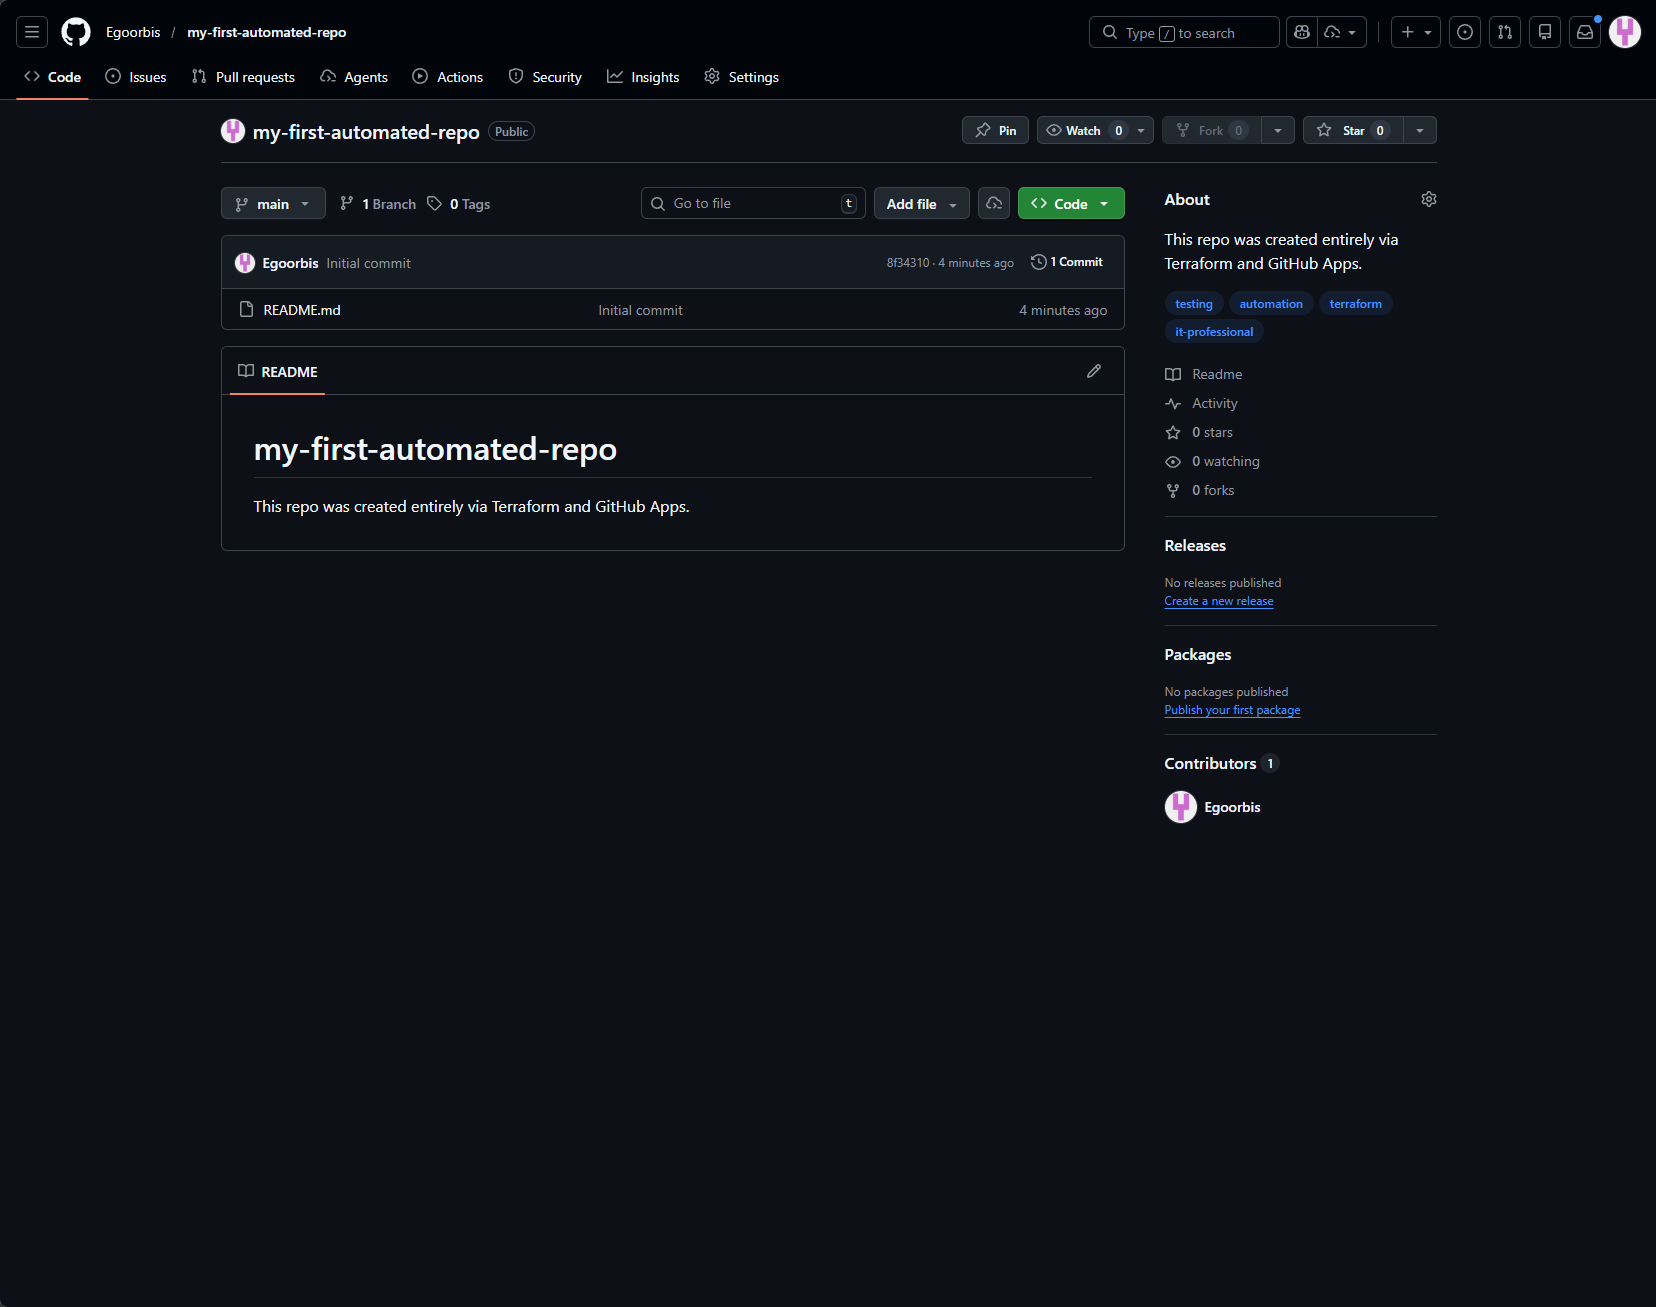
And all the secrets we need to deploy code to Azure from the new repository are automatically added

🚀 What’s Next? (Teaser: Part 2)
Building the infrastructure is only half the battle. How do we ensure that every new repository immediately knows how to run its own CI/CD pipeline?
In Part 2 of this series, I’ll explore Workflow Templates to use Terraform to bootstrap GitHub Action YAML files into new repositories, enabling them to deploy code to Azure from the moment they’re created.